supportDocs
coder packaging Instructions
Table of Contents
Anywhere you see/hear SpringWise in the documentation or video, think “cp”
Must Haves Before Getting Set-Up
- Java JDK 17 in your IDE/IDEA. If you don’t, the cp app will not run.
- Eclipse IDE users need Eclipse 2021-09 (4.21) or later. If you don’t, please install a newer version.
Starting cp
1. GitHub
What is GitHub?
> - GitHub is a web-based platform used for version control and collaboration on software development projects. > - Think of it as a very cool online storage location where you can safely store your code to share with yourself or others. > - You can have as many versions/iterations of your code as you like. > - In case you accidentally delete your code/project on your computer, it's good to have your code safely on GitHub, so you can safely retrieve it whenever you like. ---- Be given access to contribute to https://github.com/CodersCampus/cp, private repository via (Pete/Miriam).
- Click on green
<> Clonebutton. - Click
Open with GitHub Desktop. - Browser will display pop up window
Open GitHub Desktop.app?. - Click
Open GitHub Desktop.appbutton.
2. GitHub Dektop
What is GitHub Desktop?
> - At the most basic level, GitHub Desktop is an application that allows us to grab projects from GitHub and store them onto our computer. > - GitHub Desktop handles a lot of technical features under the hood. ---- In GitHub Desktop, Clone a Repository window opens to the URL tab.
- Keep the Repository URL or GitHub username and repository field as is.
- You can keep the Local Path as is or change it by pressing the
Choosebutton and selecting a different location in Finder/Explorer to store the cp repository. - Next, click blue
Clonebutton. - Current Repository should be
cp, Current Branch should bedev, and you’ll have the option toFetch origin.
3. Opening cp
What is cp?
> - cp, aka **coder packaging**, is our in house application that we are building out as a team. > - The app started with a handful of Coders Campus students wanting to build an application that utilized what we were learning in the course. > - It is growing to become an application that the students are using daily to track their coding experience. > - From day one, this application is a teaching tool for students, designed to show us what the real world is like as a Software Engineer. > - We learn how to work as a team, disagree and communicate as a team, and build something bigger than ourselves together. ---- Now open cp repository
- If you are given the option in GitHub Desktop to
Open in Eclipse IDE..., then click that button.
If you do not see
Open in Eclipse IDE..., you have the option of clicking on “Preferences” and updating the programming application you’d like to use.

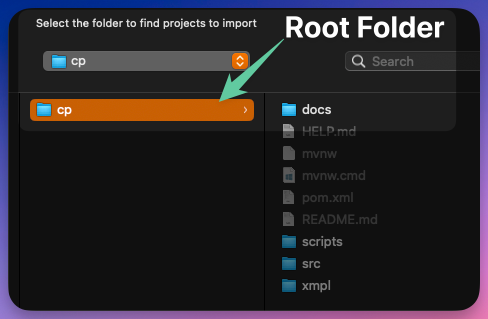
- If you do not see that option, then open Eclipse IDE app, click
on
File>Open Projects from File System...>Directory> locate cp root folder, and clickOpen.
4. Eclipse IDE
What is Eclipse IDE
> - Eclipse IDE (Integrated Development Environment) is a development platform used primarily for Java development. > - This is the programming application we'll use to code out our tasks, exercises and Assignments. > - Eclipse IDE is one of a few applications we use to code in. > - We'd like you to get familiar with Eclipse IDE, before branching out to other platforms, like IntelliJ.- Eclipse will open and give you the prompt window “Import Projects from File System or Archive”.
- In the “Import Source” field, that should be left alone, as that’s where you chose to store the cp repository, earlier in GitHub Desktop.
- Click bottom right button
Finish. - You may see “Import as Maven project”, if you do, select Maven, as this is how you need to import this project.
- cp should populate within the Project Explorer side panel of Eclipse IDE.
5. Run cp
- To run cp application you will traverse through the cp folder structure clicking the dropdown arrows as you go.
- That path is,
cp/src/main/java/com.coderscampus/cpApplication.java. - Open
CPApplication.java. - Press the green
Runbutton to run application or right click on main method ofCPApplication.java, and selectRun As>Java Application.
- You should see the Spring Boot design in the console with a bunch of other content.

- Now navigate to your browser of choice, we use Chrome, and type into the address bar
localhost:8080, this is the local address the cp application is being served too. - cp application should be live on your browser.
- If prompted to Login, then login to the application using a Gmail account.
📹 [Starting cp Instructional Video]
- If you have any questions please follow up with the team at Coder Campus for assistance
Setting up cp
To set up cp on your computer, follow these guidelines:
- Grab the
devbranch via GitHub Desktop or Terminal/BASH - Run it via Eclipse IDE or IntelliJ IDEA
Choose the method you’re most comfortable with to get cp operational.
1. Get cp dev branch
GitHub Desktop Instructions
- Open GitHub Desktop
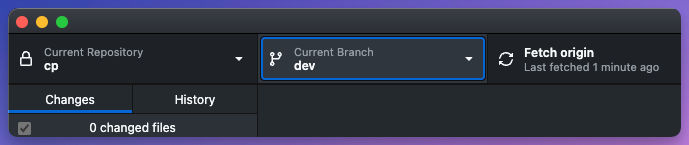
- Ensure the Current Repository is
cp, if not click the Current Repository drop-down and select thecprepository. - Ensure Current Branch is the
devbranch. - Click
Fetch origin. - If you see
Pull, after pressingFetch origin, then clickPull. - Open IDE of choice
- If using Eclipse IDE, right click root
cpfolder and click Refresh if it’s not already ondevbranch.
- If using Eclipse IDE, right click root

Terminal/Git BASH Instructions
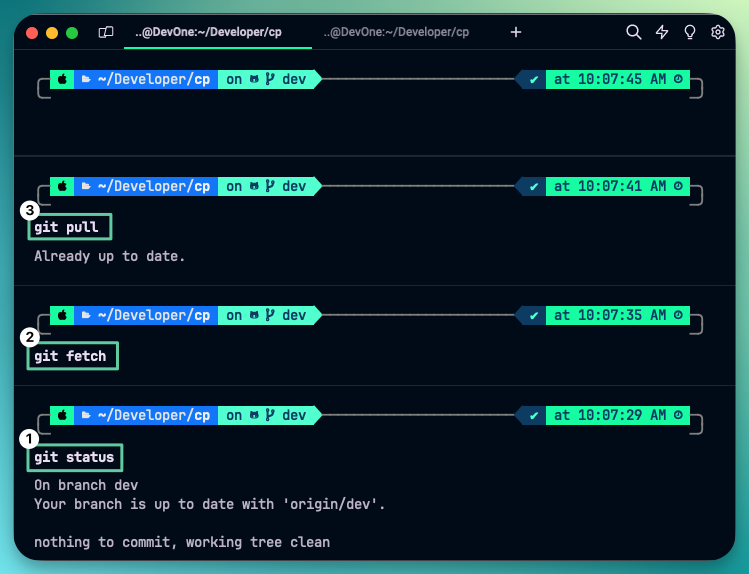
cdinto cp project folder and type the following git commands into your Terminal/Git BASHgit status- provides info on the current state of the repo. Not required, just nice to info to have.git fetch- retrieves the latest changes from a remote repository without merging them to the local branch.git pull- performs agit fetchto update local repository with changes from the remote, then performs agit mergeto merge any changes fetched into the current branch.
Performing a
git fetchAND agit pullwill mitigate potential issues, vs. just performing agit pull.
- Then open IDE of choice. Our go-to is Eclipse IDE.
2: Open cp and run locally
Run cp via Eclipse IDE
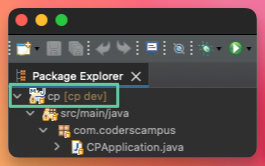
- Navigate or open to cp application, inside of Eclipse IDE.
- Right click on root folder of cp and click Refresh.
[cp dev]should appear to the right of your cp project.- Navigate to localhost:8080 in your browser of choice, we suggest Google Chrome, and ensure it’s running successfully.
Eclipse Troubleshooting Steps
Solution:
- On the
pom.xmlfile,right click > Run As > Maven CleanRun As > Maven InstallIf the Installation fails:
- On Windows: delete the h2 local database C:\Users\%user%\h2dataspringwise.mv
- Repeat Solution 1, Steps 1 and 2.
Run cp via IntelliJ IDEA
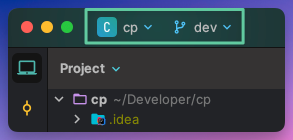
- Navigate or open the cp application, inside of IntelliJ IDEA.
- Ensure that you see the dev branch selected.
- Navigate to localhost:8080 in your browser of choice, we suggest Google Chrome, and ensure it’s running successfully.
Issues
Encounter any setup issues with cp? Please post your questions to the #active-full-stack Slack channel.